Withered Knight
- Greatsword
- Polearm & Shield
The heavy frontline pick, and the most popular class of the Steam Next Fest playtest. The developers called its killing power excellent but said heavy weapons felt sluggish — and its Polearm & Shield stance is the only one in the game documented as able to rescue downed teammates from a distance.
How the Withered Knight plays
This is the class that holds ground. The developers describe the Greatsword as having excellent killing power but a sluggish feel — heavy swings commit you, so positioning matters more than reaction speed.
Underneath both weapons sits one shared engine: the Wither and Execute systems. Landing attacks applies Wither stacks, and what you do with those stacks is what separates the two Greatsword builds from each other. The developers kept this system intact when they designed the Polearm & Shield specifically so the class would feel coherent across both weapons rather than splitting into two unrelated characters.
Greatsword: two ways to spend Wither stacks
The Consecutive Break path stops Wither stacks from disappearing when they are shattered. Breaking them one after another inflicts multiple debuffs on the target, and the developers describe the threat as growing exponentially as the break count rises. It rewards staying on one target and grinding it down.
The Delayed Detonation path instead makes Wither stacks explode on a timer. You can let them go off by themselves, or break them manually to trigger an explosion that spreads the Wither state to nearby targets. That second option is the team-fight tool — it turns a single focused target into pressure on everything standing near them.
Mechanically the Greatsword is built around Parry, which now unlocks at an earlier level and had its counter window extended, plus Breakthrough Charge and the Thorn Guide pull. The core talent Legacy grants increased health recovery when you knock down a rival Gyldhunter, which rewards pushing PvP fights rather than avoiding them.
The launch-window changes to this stance were mostly quality-of-life. Thorn Guide’s collision problems during the pull were fixed, raising its success rate. Breakthrough Charge’s second-stage branch attack lost its massive knockback, so you no longer shove ranged enemies out of your own reach. Light and heavy strike hitboxes were widened slightly so the damage area matches the visual. One change went the other way: the Endless Flow talent had its cooldown reduction percentage trimmed, because the Polearm & Shield would also benefit from it once live.
Polearm & Shield: the stance that changes the role
The second stance is the more interesting one for squad play. It brings six new skills and — uniquely in the roster — the ability to rescue downed teammates from a distance. That turns the Withered Knight from a damage pick into the class that decides whether a wipe becomes an extraction.
The polearm gives a real reach advantage, but its thrusts demand precise timing and aim. The developers deliberately adjusted the turn rate on some skills to stop that reach from becoming oppressive, and they say the stance has a slightly steeper learning curve than the Greatsword. The kite shield works differently from the Mercenary’s: you charge power while actively blocking damage, then convert it into a counterattack, and several skills carry block protection that behaves like Super Armor to give you a stable window to do it.
It also splits into two build paths. Quick Shield Bash is the aggressive one — its core mechanic raises the charge efficiency of the shield’s heavy strikes, and you can build charge while performing a shield-raise dodge, letting you suppress enemies with consecutive dashes and use the polearm’s reach to break open enemy lines. Enhanced Shield Bash is the team-defensive one: infusing the shield produces an empowered heavy strike that triggers an AoE knockback on hit, repelling nearby enemies and pulling focus fire off allies.
Both branches stay open to you. Developer Update #7 is explicit that you can mix skills and talents from the Greatsword and Polearm & Shield trees to build combinations that suit the scenario or your squad.
What the balance notes imply
Nothing in the launch-window notes describes the Withered Knight as overperforming. It received buffs, not restraints — which puts it below the classes the developers actively reined in, but it is not a weak pick, and it carries no learning-curve warning.
The 30 July patch pushed further in that direction, and every change was to the new stance. Energy drain during the shield-raising charge phase came down, and Tier-1 charged dash turning improved. Basic attack damage rose on the first and third thrusts. Spear Barrage’s damage multiplier went up. Rainbow Piercer got both a cheaper energy cost and a shorter cooldown, and Block’s energy cost dropped as well. Read together, that is a stance being made cheaper to hold open — the developers making it easier to actually play defensively rather than paying energy for the privilege.
Withered Knight skills
All 18 skills the Withered Knight can use, grouped the way the game groups them — Basic Attack, Basic Skill and Weapon Skill.
Showing all 18 skills
Basic Attack

Light Strike
Light Strike with the left mouse button can perform a three-hit combo. Each successful hit charges the weapon. Once fully charged, the weapon enters the Judgment state. The next successful left mouse button light attack will apply the Withering state to the enemy.

Heavy Strike
Heavy attack with the right mouse button: Can be charged to release a forward slash that strikes twice. All heavy strikes can execute Wither you have applied.

Basic Attack
Light Strike: Alternate between spear thrusts and horizontal sweeps. Each hit charges your weapon. When fully charged, the weapon enters Judgment. The next light strike will apply Wither to the enemy.

Charged Dash
Raise your shield to Block frontal attacks. Hold the right mouse button to maintain the shield stance and charge the skill through three levels before initiating a forward dash attack.
Lv. 1 Charge: Dash forward with your shield raised to ram enemies.
Lv. 2 Charge: Gain Super Armor, increase the dash distance, and follow with an additional thrust.
Lv. 3 Charge: Gain Super Armor, increase the dash distance, and follow with a more powerful leaping thrust.
Basic Skill
Opportunistic Thrust
After dodging, immediately use the left mouse button to branch into a light strike, dashing slightly forward while swinging your sword to attack.
Sprinting Slash
After dodging forward, immediately use the right mouse button to branch into a heavy strike, leaping forward while spinning to swing your weapon. After dodging backward, immediately use the right mouse button to perform a counterattack while stepping back. Both heavy-strike branches can execute enemies affected by Wither.

Pursuit
After any right mouse button heavy strike, use the left mouse button to branch into a light strike and rapidly perform two slashes.
Weapon Skill

Radiant Retribution
Rapidly swing your Greatsword, performing three wide slashes in quick succession. Each attack counts as a Light Strike, and hitting enemies charges your weapon. When fully charged, the weapon enters Judgment. The final strike briefly grants Super Armor.

Withering Mark
Swing the Greatsword to unleash Judgment energy toward enemies. Targets struck by the attack are immediately affected by Wither.
Breakthrough Charge
Perform a two-stage dash attack.
Stage 1: Thrust forward with your sword. During the recovery, press the left or right mouse button to perform the second-stage branch attack.
Stage 2 — Left Mouse Button: Dash in a leftward arc, sweeping enemies and knocking them back to the right.
Stage 2 — Right Mouse Button: Dash in a rightward arc, sweeping enemies and knocking them back to the left.
Parry
Assume a defensive stance that parries frontal attacks and negates their damage. Each successful parry restores Energy. The stance lasts for up to 5 seconds or ends after parrying five attacks. After a successful parry, use a Light Strike to sweep enemies in front or a Heavy Strike to perform a long-distance advancing slash. Both follow-up attacks apply Wither. Parry has a shorter base cooldown in trio mode.
Thorn Guide
Shoot thorns forward with your left hand, pulling the first enemy hit toward you. If the target is too large or in a special state such as Super Armor or Blocking, you will instead dash along the thorns toward them.

Javelin Thrust
Hurl your spear forward, immediately applying Wither to the target. Upon impact, rapidly leap to the target and pull out the spear with a sweeping strike to deal damage.
Spear Barrage
Rapidly thrust your spear forward, following with a powerful thrust that knocks the enemy down. Successful hits charge your weapon with Judgment energy.
Sacred Bulwark
Infuse the shield with sacred energy to erect a massive energy barrier, during which you cannot move or turn. The barrier completely blocks frontal attacks and prevents enemies from passing through. Cast the skill again to thrust the shield forward, dealing damage and knocking enemies back. The barrier shatters after blocking a certain number of high-impact attacks.
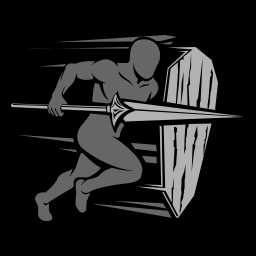
Rainbow Piercer
Raise your shield and charge forward, followed by a violent spear thrust. Hold the skill to prolong the forward charge, during which turning capacity is significantly reduced. The raised shield has the Block property. Successful hits charge your weapon with Judgment energy.

Intervene
Dash forward a set distance, or directly to a targeted ally. Then raise your shield to unleash an energy pulse that knocks back nearby enemies and grants a Shield to allies within range.

Breaker Shield Bash
Strike the back of the shield with your fist to damage targets in a wide frontal area and immediately apply Wither. The raised shield has the Block property.
Skill names and effect text are second-hand, taken from mistfallhunter.wiki; Bellring Games has not published a skill list. Flavour text has been left out. Animations load only when you ask for one.
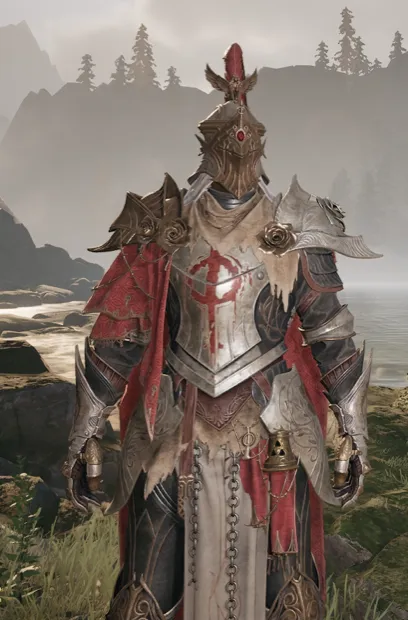
Official Withered Knight design art
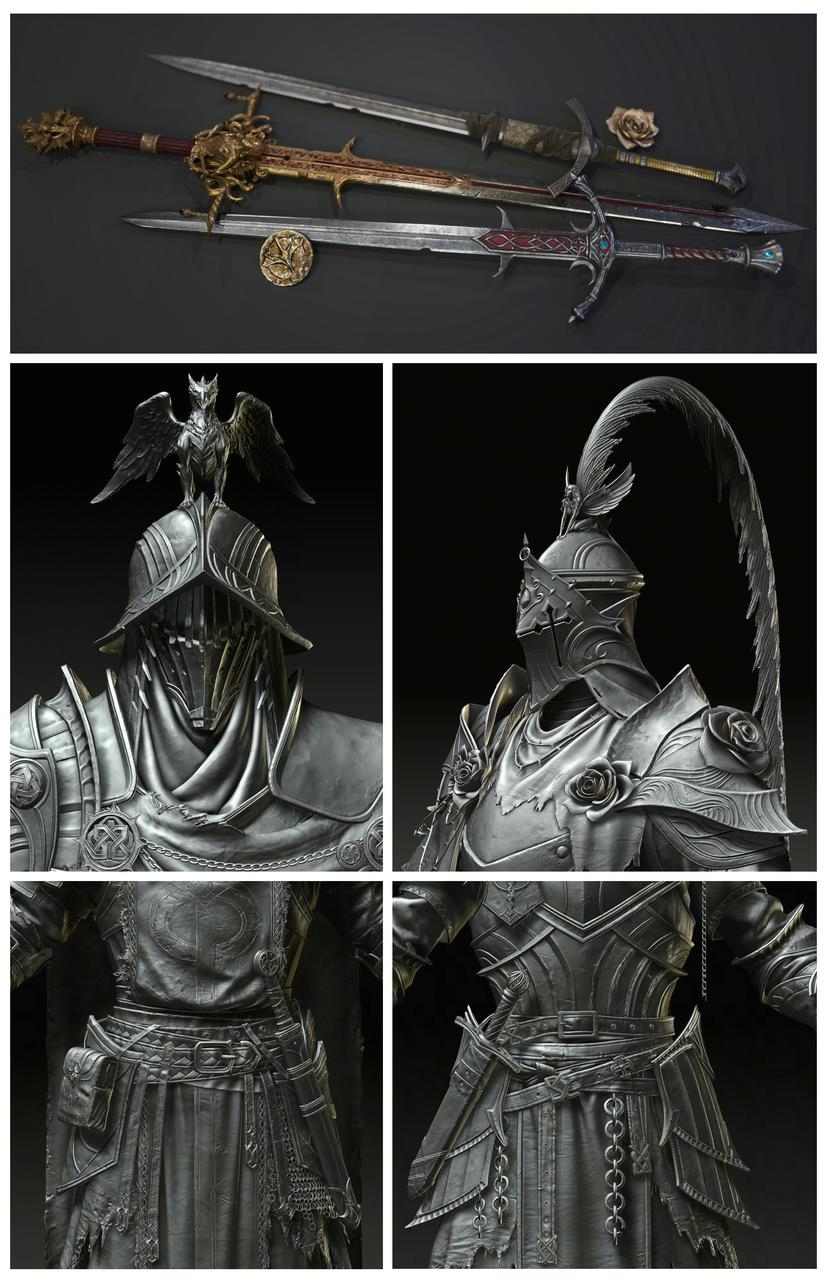
Developer Update #6, captioned by the developers as: High-Poly Knight Character and Asset Detail Renders. 
Helmet design study from Developer Update #6. The closed visor conceals all facial expression by design.
Artwork published by Bellring Games in Developer Update #6, 13 June 2026.
Other classes
Compare all →Other Mistfall Hunter data
Frequently asked questions
Is the Withered Knight good for beginners in Mistfall Hunter?
It is the safest first pick. It was the most played class during the Steam Next Fest playtest, the developers described its killing power as excellent, and it is not one of the two classes they flagged for a steep learning curve.
What weapons does the Withered Knight use?
Two stances — Greatsword, and Polearm & Shield. The Polearm & Shield launched with Season 1 and received balance adjustments in the 30 July 2026 patch.
Can the Withered Knight revive teammates?
Yes. The developers describe the Polearm & Shield stance as having a unique ability to rescue downed teammates from a distance, which no other stance is documented as having.
What are the Withered Knight's build paths?
Four. The Greatsword splits into Consecutive Break and Delayed Detonation, both built on Wither stacks. The Polearm & Shield splits into Quick Shield Bash, which is offensive, and Enhanced Shield Bash, which protects the team. The developers say you can mix skills and talents from both weapon branches.
Can you mix Greatsword and Polearm & Shield talents?
Yes. Developer Update #7 states that Gyldhunters can flexibly choose skills and talents from both branches to build unique combinations based on the scenario or team composition.